


So our friend Micki made THE CUTEST wreath and I couldn't help but snag the idea.

What you'll need...
-A bunch of pine cones
-A small to medium sized box
-Glue gun
-Spray paint
-Ribbon
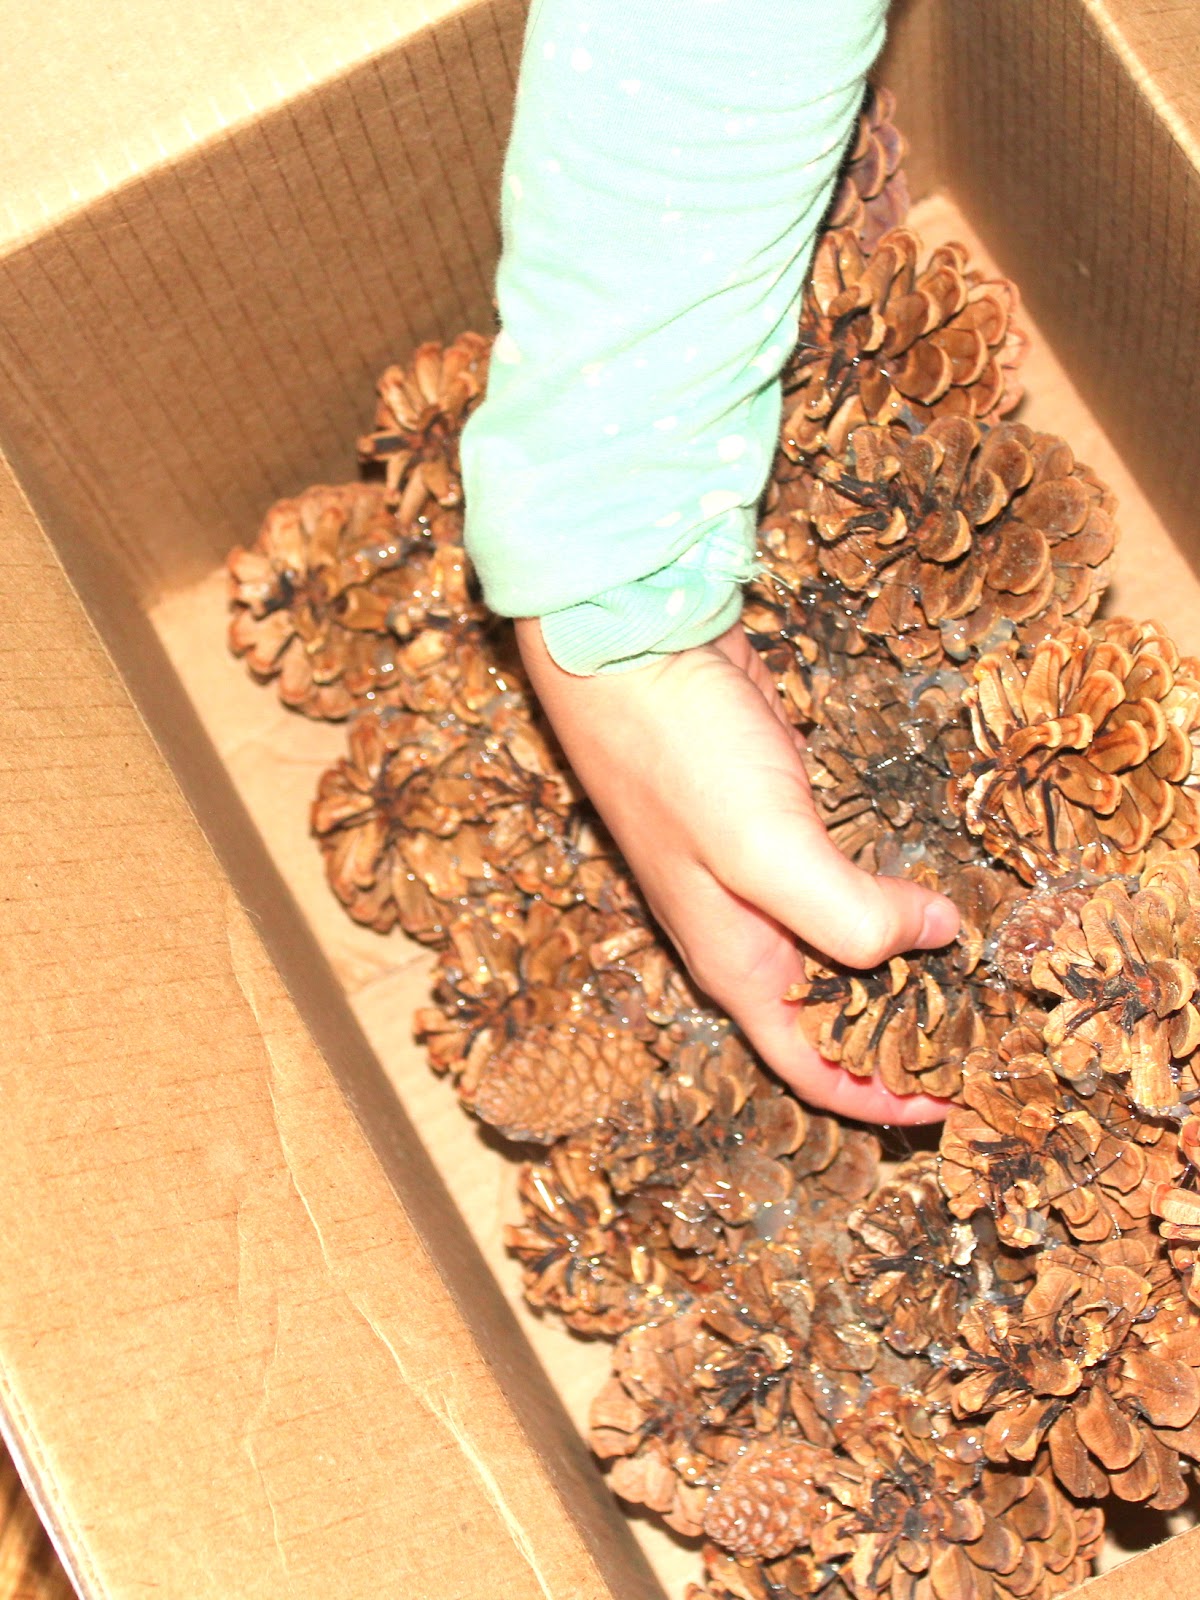
First, you will take your box and layer two rows of pine cones all the way around the inside of the box like this...

Then you will take your handy glue gun and douse every inch of those bad boys in glue. The idea is that once you've glued them and it's all dry, you can take the entire thing out in one piece...


...like this...
It will still feel a bit flimsy, so I took mine out, flipped it upside down, and glued a bunch more on the back side to ensure it would not break on me.

Once I figured it was as stuck together as it was going to get , I removed as much of the glue strands as I could. The one downfall of hot glue are the glue strands right? Yes.
I then took it outside and spray painted the entire front side. I did a couple coats on mine.
Once dry, I flipped it over and glued a couple different colors of ribbon to the back so I could hang it on my front door...


I think it turned out pretty cute.
And for like $3? Can't beat it... :)
Thanks for the idea and for the pine cones Micki!
Oh and... we have also had lot's of people asking for house pictures.
We promise a really fun before and after picture next week so sorry for the delay! :)