Showing posts with label Tutorials. Show all posts

Wednesday, January 29, 2014

Oh My Heart!

Oh my HEART is the perfect name for this post because I just can't seem to get enough of this giant heart hanging in our window. The warm lighting it creates as the winter southern sun shoots through our front window (wow, that should be in a country song!), or the heart shadows it casts on various walls throughout the day... I'm just completely smitten with it! Wren keeps saying, "Wow Sav, you are pleeeeased with yourself." Yes I am Wren, yes I am. You see, what was supposed to be a big red streamer to go across the room for my cousin's bridal shower, turned into this, last minute. It was like this epiphany with music and birds... But I mean really, does it not fit inside that window perfectly? "It was custom sizing!" is what I'm telling folks! But mostly I'm pleased because my weird, random, and last minute ideas never turn out, so that's why.

How I did it? I just cut nothing short of a million pieces of red fabric (remnants from when I draped red fabric across our ceiling in our first apartment right after we were married. Let's just say it was as if we lived in a sushi bar. Never again... WHAT WAS I THINKING!? Romance I guess ;)) with my fabric cutting board and razor (if you fold and fold and fold the fabric, you can cut lots at a time!) and then just tied about six pieces in a knot around a piece of hemp string. And I did this over and over and over and over again until they were gone. I'd say I used three to four yards of fabric. Once I was done tying, for the love of Pete! I tied it into one big circle on the ground and then formed it into a heart shape. I then put a big yardstick at the top of the heart (to act as the drape rod I would be tying it to) and cut my hemp string in different lengths accordingly (if you look at the pictures above, it's pretty self explanatory). Once I hung it I tied a couple of my heavier bangle bracelets to both the points of the heart to hold them down, this heart just didn't wanna be tied down! But what heart does? MINE! ;)

Anyway, I think you should all go make one. It's quite rewarding and very festive! Let the HEART be with YOU!

And then sometimes this happens... 
Ouch.

Wednesday, April 24, 2013

1 Hour Bumper Pads + Link Up!

So I have been meaning to make a matching quilt, crib skirt, and bumper pads since Radcliff was born last year, but time slipped away from me and I just never got to it. Well, now that we moved his nursery over, we wanted fun bedding to go with him's new big boy room! We love how everything turned out and thought it might behoove you if we shared (don't be jealous I'm cool enough to use the word behoove). But really, making your own bedding for a crib is not only cheaper (can be), but you can get exactly the look you are going for! 
Here's how I made them:
1. Find some used bumper pads
2. Lay the pad (not a maxi pad ;)) out on the fabric you're going to use and cut just enough around the edges for your seam allowance. Except on one of the ends, leave about four extra inches (you will use this for the opening to slide your pads inside).
3. Once you have done this, cut the piece right in half and lay right sides together on another piece of fabric. You'll want to lay the two half pieces over each other a couple inches, line up with the existing bumper pad (so you know how long to make it), and cut right around the first piece (two pieces you cut), you with me?
4. Next, you fold both the inside pieces about an inch or two under and pin.
5. Once you have pinned both sides under and pinned...
6, 7. Take to the sewing machine and hem both sides under. I used a fancier stitch on mine.
8. It should look like this when you're finished (I folded right side up so you could see)
9, 10. This is what is should look like keeping right sides together.
11. Now cut off the ties on the existing bumper pads (I suggest finding pads with ties you like so you don't have to make your own) or use ribbon. You'll lay the edges (side you cut) hanging out of the sides or your fabric like a half inch all the way around the bottom piece (the one piece one) of fabric and pin each on down.
13. You'll then take the other half piece of fabric, lay it over the top (right sides together) and pin down.
14. Sew around the edges of the first piece.
15. Repeat with second piece of fabric.
16. It should look like this when you've sewed both peices.
Trim all excess thread off, snip corners, fold inside out, and place original bumper pads inside.
Voila!
Easy right?
Only bummer? Now you have to repeat to the other three pads...
Good news? You only have 45 more minutes of sewing left!
Unless...
I also decided to get down with my bad self and make a matching quilt and pillow.
(Add minky dot to the back of any quilt to make it soft for baby's skin :))
For all of one second I thought about posting a tutorial on how to make them, but then decided making them was hard enough as it was without trying to explain how I did it. So let them just be inspiration to you (if you even like em!) For the quilt, I just eyeballed and created my own pattern because using patterns, in my opinion, is for the birds (I'm just jealous they don't make an ounce of sense to my square head). I did the same thing for the pillow. I would recommend this to anyone who is pattern illiterate like I am. Just wing it! 

Side-Notes: I purchased the main bumper pad fabric from Home Fabrics when they were having one of their amazing blowout sales and I got it for THREE dollars a yard and it is the heavy duty upholstery fabric (like 60 inches wide!) I bought like six yards of it and it came to about $20. To say I was pleased was an understatement! Home Fabrics is bomb for their deals. If you live here and haven't been, I really am embarrassed for you ;) The black and white fabric I used in the pillow and quilt, I bought from a little quilting shop (can't remember the name?) when they were going out of business and were closing out all of their stuff. This is why I said making your own can be cheaper. You have to find a good deal on fabric or it's really more expensive sometimes. But again, you do get exactly what you want! Wow, longest post ever. Hope you lasted!
Feel free to email me with any questions you might have!
AAAAAAND... That's all she wrote.
Now it's...
Rolled Up Pretty
Link WHATEVER, WHENEVER up! As long as it's cool ;) Just have it be to a specific blog post.
I want to see what you've created, done, eaten, made, worn, or just think is awesome enough you have to share! Please visit a couple others who have linked up as well. We all love some comments right?
Link away....

Tuesday, February 5, 2013

DIY Baby Outfit + Link Up

 
Sometimes it's hard finding clothes for my little man that are my style and also accentuate his curvy little figure. I have been wanting to make him a form fitting pair of knit pantalonies for awhile now. In fact, I've even had a pair cut out of an old knit shirt I don't wear anymore, that have been ready to be sewn since he was a month old, but the elastic band I'd need to put around the waist has me frightened. So I just kind of threw the remnants in my sewing cabinet, figuring it was a lost project.
Imagine my excitement when I found an easy, cute tutorial on THIS adorable blog the other day on how to make baby leggings out of a skirt!? I then went ape and whipped up matching stockings and a beanie as well.  I just had to share!

What you'll need: 
-A $6 stretchy knit skirt (I bought a shorter one so I could use both hemlines from the top and bottom of the skirt, as well as getting the biggest size they had to get more fabric for the same price, see how clever I am?)
-Scissors
-Sewing Machine (obvi)
-Pins
-Baby leggings to trace your pattern

1. Place leggings on skirt that is flipped inside out
2. Trace around the leggings with a pencil onto the skirt (not pictured)
3. Pin where you traced
4. Cut about 1/4 of an inch out from the pins (to allow for your seam allowance) all the way around the pants
5. Sew all the way around
6. Flip inside out, and wala, baby pantalonies!
Well not wanting any of the fabric to go to waste...
I took the extra and basically did the exact same thing detailed above to make a matching beanie...
...and stockings.
It's Wren and I's favorite outfit on him!  And all for $6 bucks!
Now it's...
Rolled Up Pretty
Link WHATEVER, WHENEVER up!
As long as it's cool ;)
Just have it be a specific blog post link.
I want to see what you've created, done, eaten, made, worn, or just think is awesome enough you have to share!
Please visit a couple others who have linked up as well.
We all love some comments right?
Link away....

Tuesday, November 27, 2012

DIY Coffee Filter Wreath

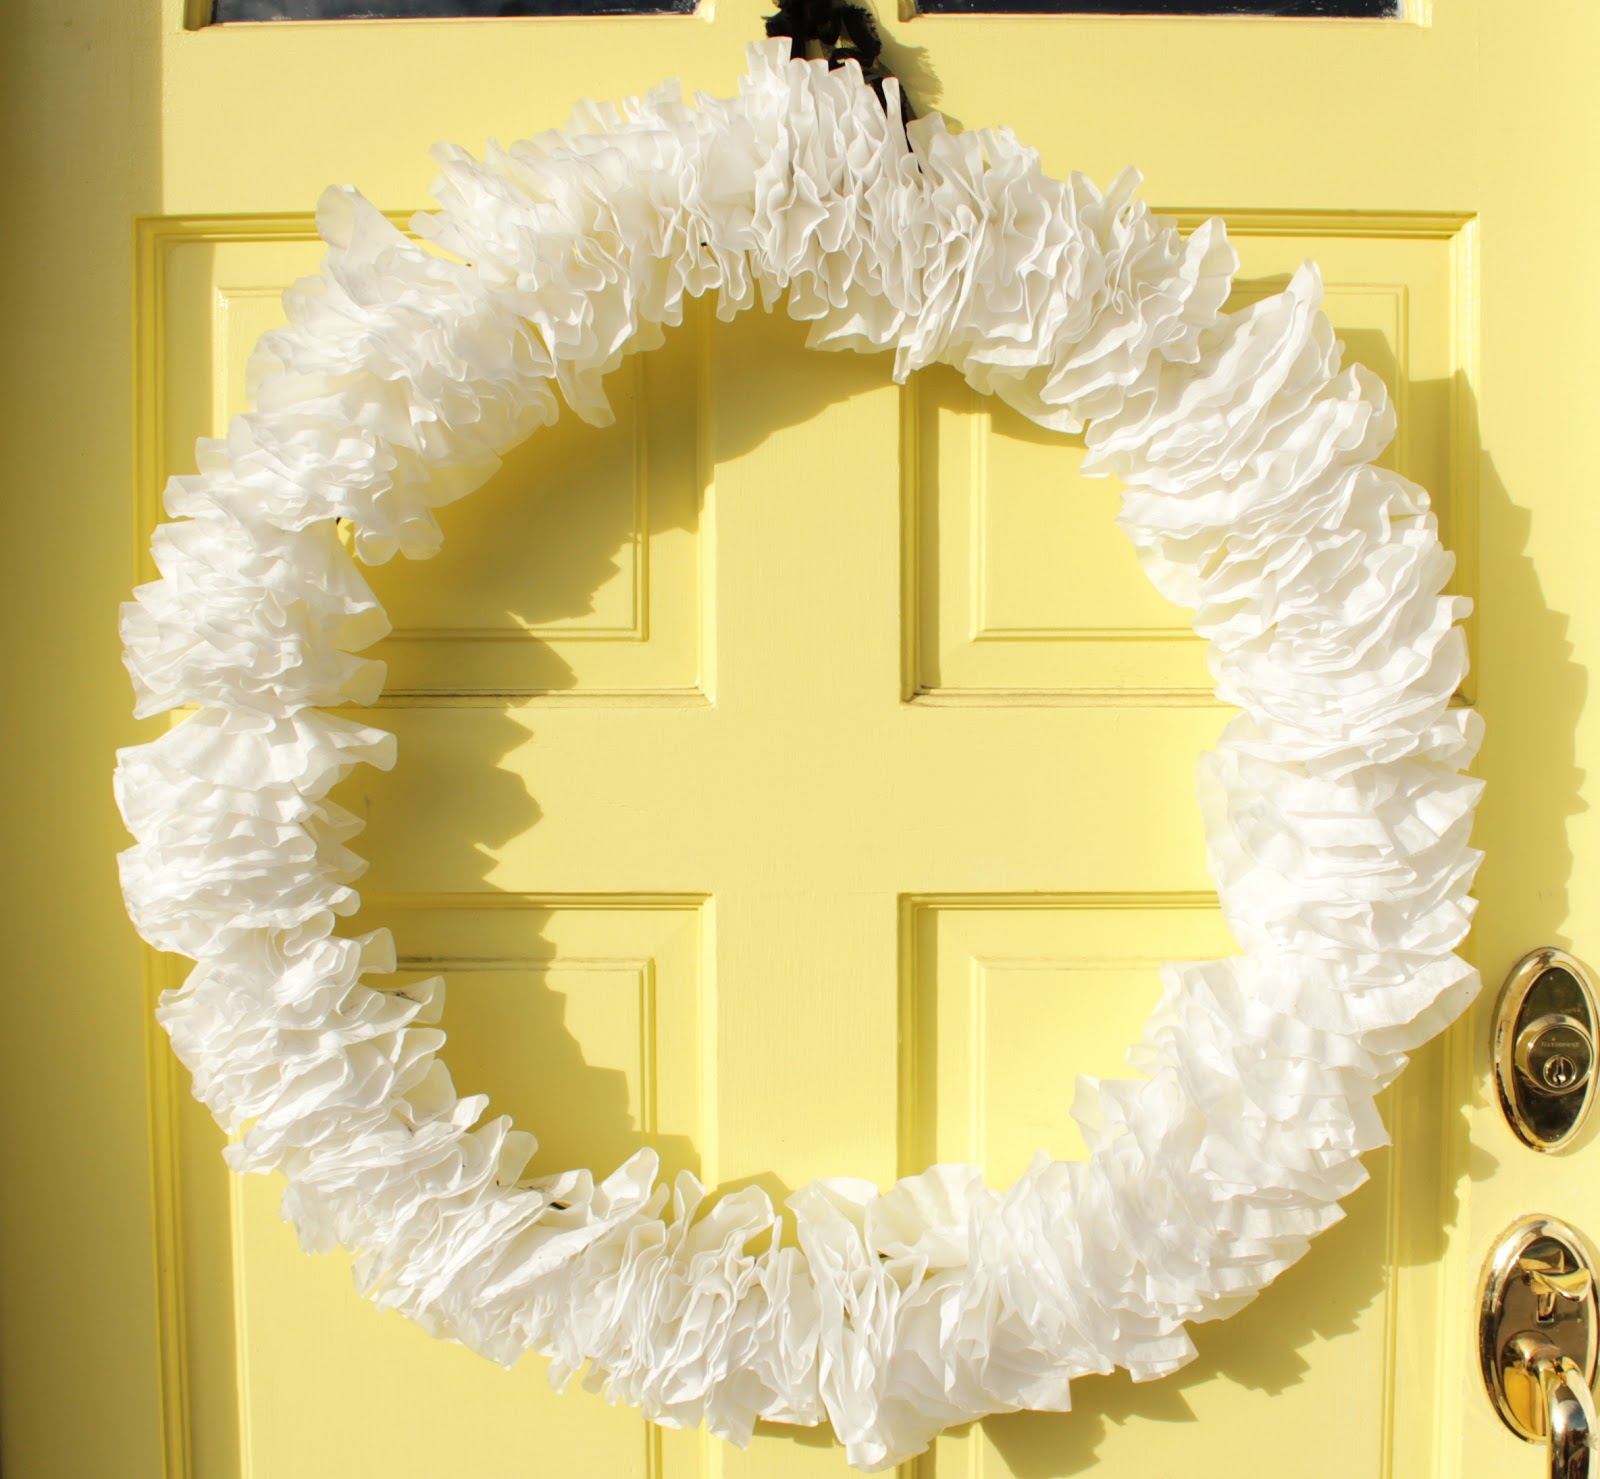
I've been meaning to share this DIY wreath with you guys forever now.  Babies right?  Everything takes way longer now :)  This wreath really is the easiest thing ever to make.  All you need is one round wire wreath form, that I believe you can pick up from any craft store.  I bought mine at Hobby Lobby.  One package of coffee filters (I only used like an 1/8 of the package, so if you already have coffee filters, chances are you'll have enough!) and your glue gun.  Really all you do is crinkle each coffee filter at the base so it makes a cone/flower type shape.  Follow?  Glue the base (or the cone at the bottom) in between two of the wires on the wreathe.  Proceed all the way around the wreath.  You can get whatever size wire wreathe you want and glue the coffee filters however close or far away from each other as suits you (I glued mine very close together).  But then you knew that right?  Being the free U S of A that we live in...
Oh and I also glued a black ribbon to the top to hang on the nail in our door, but you wouldn't even have to do that.  You can just hang the wire on the nail too :)
Happy wreathing!

Thursday, June 21, 2012

Pine Cone Wreath Tutorial

So our friend Micki made THE CUTEST wreath and I couldn't help but snag the idea.  
What you'll need...
-A bunch of pine cones
-A small to medium sized box
-Glue gun
-Spray paint
-Ribbon
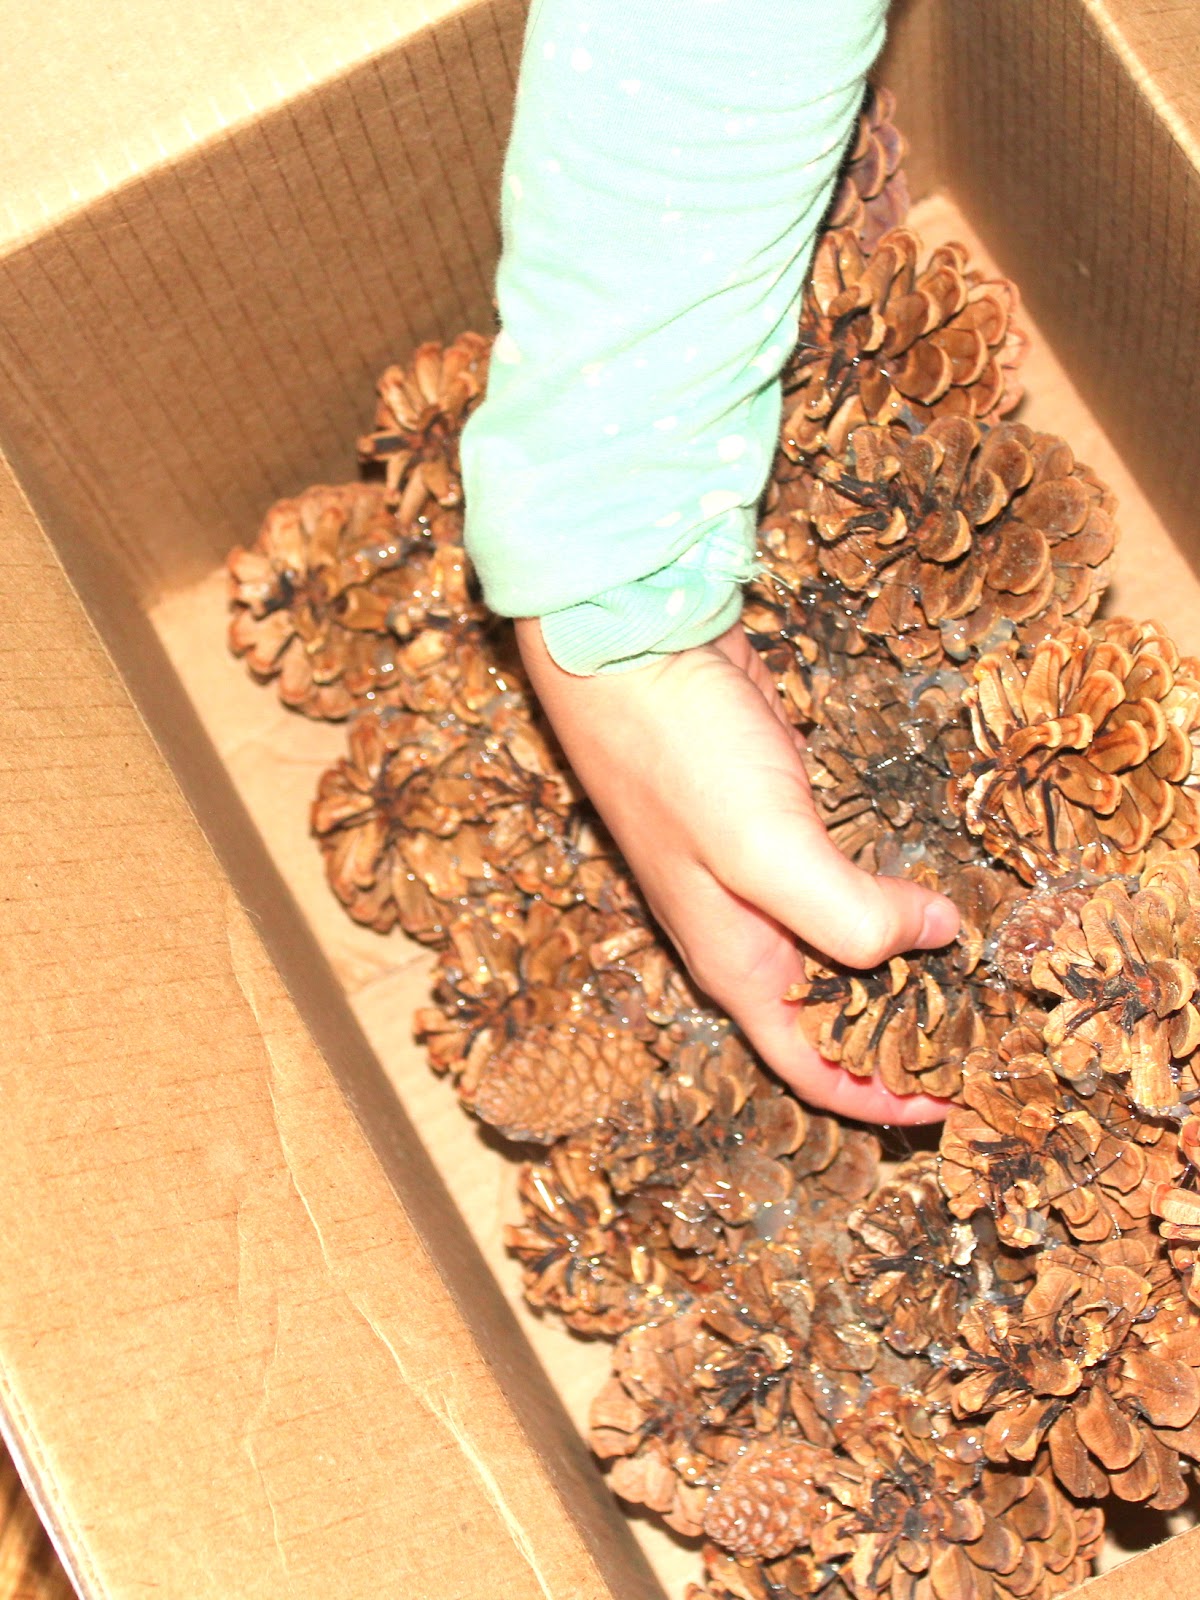
 First, you will take your box and layer two rows of pine cones all the way around the inside of the box like this...
Then you will take your handy glue gun and douse every inch of those bad boys in glue.  The idea is that once you've glued them and it's all dry, you can take the entire thing out in one piece...
...like this...
It will still feel a bit flimsy, so I took mine out, flipped it upside down, and glued a bunch more on the back side to ensure it would not break on me.
Once I figured it was as stuck together as it was going to get , I removed as much of the glue strands as I could.  The one downfall of hot glue are the glue strands right?  Yes.
I then took it outside and spray painted the entire front side.  I did a couple coats on mine.
Once dry, I flipped it over and glued a couple different colors of ribbon to the back so I could hang it on my front door...
I think it turned out pretty cute.  
And for like $3?  Can't beat it... :)
Thanks for the idea and for the pine cones Micki! 
  
Oh and... we have also had lot's of people asking for house pictures.  
We promise a really fun before and after picture next week so sorry for the delay!  :)

Tuesday, June 12, 2012

DIY Roll Up Drape

So my mom is basically bomb and has made/is making so many of the drapes for our home.  She's awesome at knowing the look I'm going for and somehow making it happen.  Our kitchen window was a sad little kitchen window and needed something to cheer it/me up.  It's not a very big window  and is directly above the kitchen sink so I knew I wanted a panel type drape that I could leave up most of the time.  
My mom did it perfectly and here's a little tutorial on how we (Wren, isn't he a champ?) hung it...
First off, my mom covered a little piece of wood, the width of our window, with the fabric I wanted (this is what you'll screw into the wall).  She also added Velcro so I could Velcro the drapes on and off to wash them.  
What a nice and smart mommy huh?
Wren used the stud finder, that somehow always goes missing (different story for different day), and screwed the wood piece into the wall.  
My mom attached ribbons so I could roll the drapes up and down (you'll see what I mean below), so Wren set the ribbons in their position before screwing in the board.  
What a thinker that one is right? :)
We then Velcroed the drapes to their board friend and strung the ribbons over the top.
My mom also attached a round rod at the bottom of the drapes to ensure easy rolling.
All we have to do now is roll them up or down and tie them in place.
I couldn't be happier with them...
THANKS MOM!